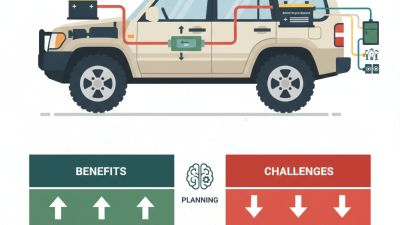
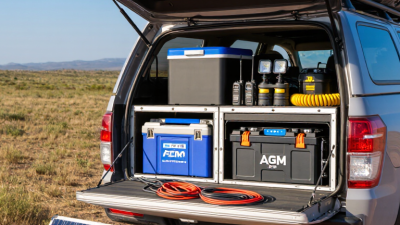
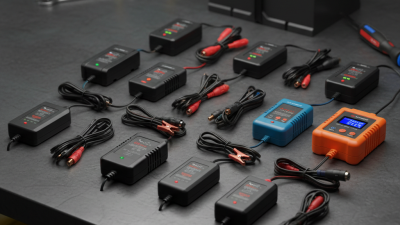
Choosing the best dc to dc charger with solar input is not a contest of headline wattage. It is about matching the charger to your battery, alternator, and solar array. A unit that looks powerful on its box may perform poorly if its voltage limits or charging profile do not suit your setup.
Marine electrical author Nigel Calder’s guidance can be paraphrased this way: “Choose charging equipment for the whole system, not the biggest number on the label.” This is a paraphrase, not a verbatim quotation. The principle matters in real installations. Picture a campervan parked in afternoon sun, with a warm engine bay and a partly shaded panel. The charger must manage changing solar input while protecting the battery and keeping alternator charging within suitable limits.
Details matter. Compare supported battery chemistries, maximum solar input, output current, temperature protection, and installation requirements. Check whether the charger can combine solar and alternator power, and how it behaves when either source drops. A clear manual and dependable monitoring can make troubleshooting far easier.
There is no universal winner. A compact unit may suit a small travel trailer, while a larger system may need more solar capacity and careful wiring. This guide compares practical features and trade-offs to help identify the right dc to dc charger with solar input for your setup. Real installations vary, and specifications deserve a second look before you buy.
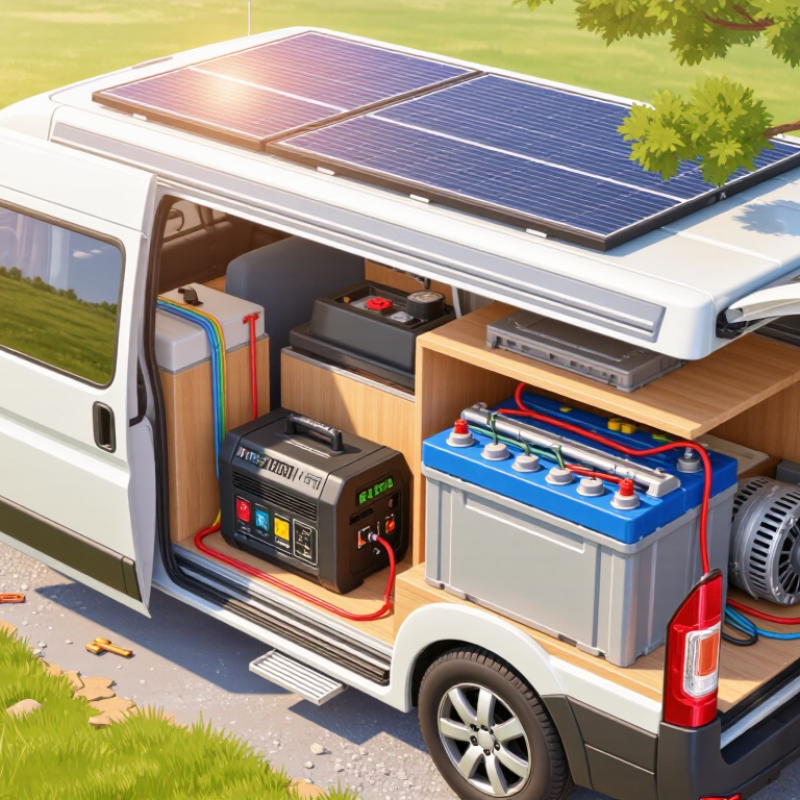
A DC-to-DC charger with solar input connects the vehicle’s starting battery, alternator, solar panels, and house battery. While driving, it regulates alternator power for the auxiliary battery instead of sending vehicle voltage directly. When parked, solar energy can enter through the same unit, often using a built-in solar charge controller. One charging path. That matters when clouds pass: panel output rises and falls, while the charger manages voltage and current within its limits. A dual-input model may accept both sources, but it may not combine their full output at every moment. Its design may prioritize one source, limit total current, or switch as conditions change. Check the manual and input specifications.
In practice, match the charger to the battery chemistry, capacity, alternator output, and panel voltage. Use correctly sized cables and a fuse near each power source; long, thin wiring can waste energy as heat. A loose connection can be subtle. At camp, check the charger’s status lights and battery monitor rather than assuming sunshine means full charging. Shade from a roof rack or tree can sharply reduce panel production, even when the sky looks bright. The setup is not magic. A small panel may only maintain a battery, while a larger array can contribute meaningful daytime charging. Readings can still be imperfect: battery temperature, cable length, and changing loads affect what reaches the battery.
How a DC-to-DC charger can use vehicle and solar power
This illustrative comparison shows available input power, not guaranteed battery charging output. Solar power varies with sunlight, panel angle, and shading; vehicle power depends on the alternator and charger limits. A compatible charger may use both inputs when operating conditions and its design allow.
A solar-input DC-to-DC charger performs best when its voltage window matches the solar array. Check the array’s open-circuit voltage, including its rise in cold weather, against the charger’s maximum input rating. Also compare operating voltage and current limits; a mismatch can waste available power or trigger protection. MPPT control helps the charger track changing sunlight, while a suitable battery profile prevents overcharging.
Heat matters. NREL’s PVWatts Version 8 documentation uses a default power temperature coefficient of -0.37% per °C for crystalline-silicon modules. At a cell temperature 40°C above the reference temperature, that implies roughly 15% lower output, before other losses. A charger’s own thermal derating can reduce charging further. Mount it where air can circulate, and inspect cable length and gauge: thin, long cables can cause voltage drop. Real installations rarely match tidy test conditions.
Tips: Size the solar array within the charger’s voltage and current limits, and leave headroom for cold-weather voltage. Check battery settings, fuse ratings, and connection tightness. A simple midday voltage and current reading can reveal a poor connection or unexpected shade.
Sources: NREL, PVWatts Version 8 Technical Reference.
A good DC-to-DC charger with solar input should match the battery, vehicle, and panel—not just look powerful on a product label. Check the battery’s chemistry and nominal voltage, then confirm the charger offers the correct charging profile. Lithium and lead-acid batteries do not share identical settings. Also compare the charger’s maximum output with the battery maker’s recommended charge current. Bigger is not always better.
Solar limits matter. Look at the charger’s permitted solar voltage and current, then compare them with the panel’s open-circuit voltage and rated output. Leave room for cold-weather voltage increases; a panel can exceed its listed operating voltage in chilly conditions. For example, a 200-watt panel may not deliver 200 watts through every cable, angle, or cloud. Real conditions intervene. Check both solar and alternator input ratings, especially if the vehicle has a smart alternator.
Installation details can change the result. Confirm the required cable gauge, fuse placement, airflow, and mounting space before buying. A long, thin cable can cause voltage drop, while a charger tucked beside hot engine parts may reduce output. If possible, compare clear monitoring features, such as separate solar and vehicle charging readings. They make troubleshooting less guesswork. One detail is easy to overlook: charging needs vary with temperature and battery condition, so a single advertised output figure cannot tell the whole story.
A charger should match the way you travel, not just the largest battery you might buy later. Weekend campers often need modest charging for lights, phones, and a fridge. Long-distance travelers may need higher output to replace daily battery use during short drives. Check alternator limits, battery voltage, supported chemistry, and solar-input range. A panel’s wattage alone is not enough. NREL’s PVWatts model estimates solar production using location, panel direction, tilt, and system losses, so compare expected daily energy with your real use. Cloudy weather and roof shade matter. I still find it easy to overestimate what a flat-mounted panel can deliver.
For remote trips, prioritize useful solar input and clear charging controls; for frequent driving, alternator charging capacity may matter more. Match the charger’s solar voltage and current limits to the panels, and leave room for safe wiring and fusing. IEA PVPS’s Trends in Photovoltaic Applications 2024 reports about 1.6 terawatts of cumulative global PV capacity by the end of 2023. That growth shows solar’s scale, not the output a small travel setup will achieve. A charger with sensible protections and adjustable battery settings is usually more valuable than chasing peak amperage. Check the manual carefully; compatibility details can be easy to miss.
A good DC-to-DC charger with solar input is only useful when its limits match your system. Check the charger’s solar voltage and current range against the panel’s specifications. Pay particular attention to the panel’s open-circuit voltage, which can rise in cold weather. The charger must also support your battery chemistry and its required charging profile. Compatibility with the vehicle’s alternator matters too; newer charging systems may need a charger designed for variable input voltage. Small details matter.
Plan the installation around airflow, cable length, and access for inspection. Mount the unit away from standing water and excessive heat, while keeping its status indicators visible. Use cable sized for the current and run length, and install fuses near the power sources as specified by the manual. Loose terminals can heat up under load. I would not assume a panel is compatible just because its nominal voltage seems right; checking its full specifications is worth the extra minute.
Before wiring, isolate the relevant power sources and follow the charger’s connection sequence. Confirm polarity carefully, then inspect crimps and insulation for damage. Keep cables secured away from sharp edges, moving parts, and hot exhaust components. After installation, test charging from the alternator and solar input separately, then monitor battery voltage and charger temperature during normal use. If readings are inconsistent, stop and recheck the wiring rather than guessing. A qualified installer can verify uncertain grounding or protection choices.
| Use case | Charger output to consider | Solar input and panel checks | Battery compatibility | Installation and safety considerations |
|---|---|---|---|---|
| Small auxiliary battery system Light loads and occasional trips |
Around 20–30 A, subject to the battery maker’s recommended charge current and the vehicle’s available power. | Choose a unit with an MPPT solar input. Confirm the panel array’s operating voltage and cold-weather open-circuit voltage (Voc) are within the charger’s specified limits. | Select a charging profile that matches the battery chemistry and manufacturer’s voltage limits. Confirm lithium batteries have a suitable battery management system (BMS). | Mount securely in a dry, ventilated location. Use cable sized for current and cable-run length, and install fuses or circuit breakers as specified by the charger and wiring requirements. |
| Medium-capacity touring system Regular use of a fridge and other 12 V equipment |
Around 30–40 A may suit some systems, but verify alternator capacity, battery charge limits, and charger derating at high temperatures. | Check the charger’s maximum solar input voltage, allowable solar power, and input-current limit. Panel wattage alone does not confirm compatibility. | For a multi-battery bank, check that the batteries are approved for the intended parallel or series arrangement and that the total charge current is acceptable. | Protect positive cables near their power sources. Keep wiring away from heat, moving parts, and sharp edges; use grommets where cables pass through panels. |
| Large-capacity or high-load system Frequent use or faster recharge needs |
Higher output may reduce charging time only if the alternator, wiring, battery, and charger can all support it. A 40 A output at 14.4 V is about 576 W of charging power. | Confirm the solar array stays within all input ratings, including maximum Voc in the coldest expected conditions. Follow the specified series/parallel panel arrangement. | Check the battery’s maximum charge current, temperature limits, and required voltage settings. Do not assume every lithium battery uses the same charging profile. | Have a qualified installer assess alternator loading, cable voltage drop, fuse ratings, and thermal conditions. Follow vehicle and charger installation instructions. |
| Vehicle with a smart alternator Alternator voltage varies during operation |
Use a charger specifically designed to operate with variable-voltage alternator systems, if required by the vehicle. Confirm its ignition or engine-running control method. | Solar input can provide an additional charging source, but check the unit’s source-priority or combined-input behavior in its documentation. | Set the battery profile accurately and ensure charging is stopped or limited when required by the battery’s temperature or BMS protections. | Use the vehicle manufacturer’s approved connection points and control signals. Avoid connecting directly to sensitive vehicle circuits without checking compatibility. |
| Any system: final selection checks | The most suitable charger is one whose output, input limits, battery profile, and installation requirements match the complete system—not simply the one with the highest amp rating. | Compare the panel array’s Voc, operating voltage, current, and power with the charger’s published solar limits. Allow for increased Voc in cold conditions. | Follow the battery manufacturer’s charging instructions. Confirm the charger supports the required nominal system voltage and battery chemistry. | Disconnect power sources before wiring. Observe polarity, use correctly rated protective devices, and follow local electrical and vehicle regulations. Consult a qualified professional if unsure. |
Ratings and suitable configurations vary by charger, vehicle, solar array, and battery. Always verify the specific product documentation and applicable installation requirements.
Stay in touch with the latest National Luna Products and News!